SEG Graphic Information Requirements
Orbus prints graphics for a wide variety of aluminum Silicone Edge frames and systems. We stock Orbus and non-Orbus frames and a variety of beading types and widths, ensuring the perfect graphic fit for any frame system!
These instructions will help you prepare a graphics' order by collecting a frame's measurements and other required information and to help you set up and remove SEG graphics.
How to Apply & Remove Graphics
INSTALLATION AND REMOVAL OF SEG GRAPHICS IS EASY!
Installation:
Push the SEG bead into each corner of the frame (1-4) with your thumb. 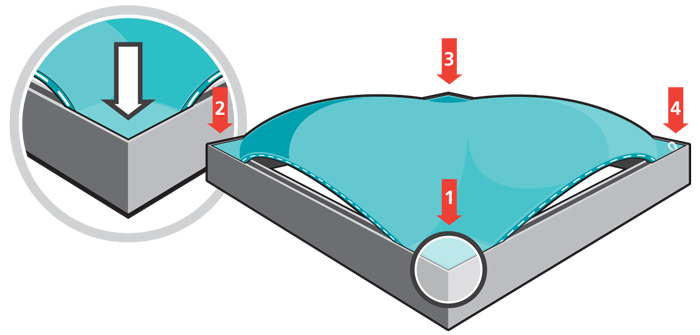
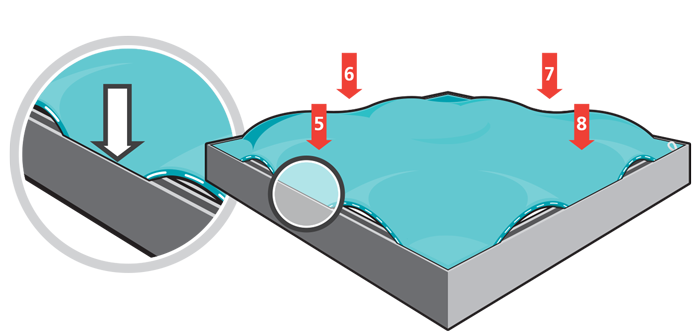
Push the SEG bead into the middle of the run (5-8) and work your way around the perimeter of the frame until all beading is pushed in properly.
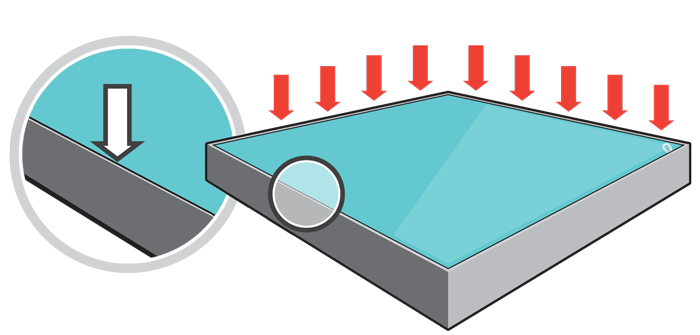
If necessary; Go around the perimeter again to ensure beading is secure in the extrusion profile.

Removal:
Use the pull tab located on the graphic and gently pull the graphic from the frame, going around the perimeter SEG Information Requirements
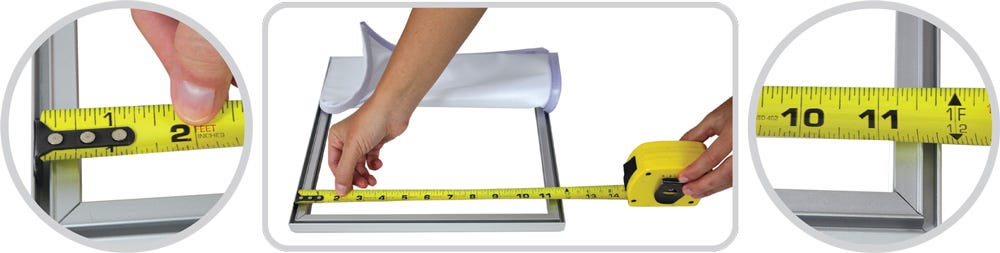
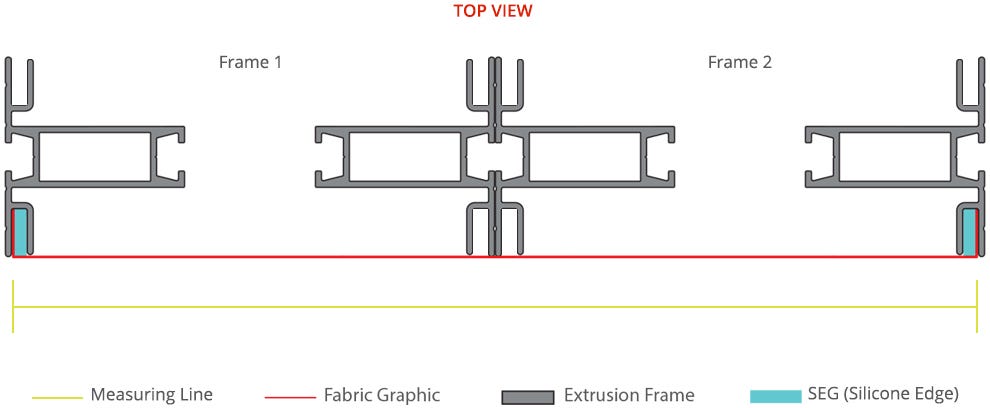
FRAME/PANEL DIMENSIONS W&H IN INCHES
Measure this way to ensure success!

FRAME BRAND/STYLE IS STRONGLY RECOMMENDED
Learn what systems and profiles Orbus prints SEG graphics for. Learn more »
Measure this way to ensure success!
How to Measure: Measure the outer interior edge of the channel to the opposite outer interior edge of channel.
Edge to edge, graphic measures 11.75"
Ensure to measure the combination of frames if there are more than one.
FRAME BRAND/STYLE IS STRONGLY RECOMMENDED
Learn what systems and profiles Orbus prints SEG graphics for. Learn more »
BEADING THICKNESS
Thinner = 1/16”
Thicker = 1/8”
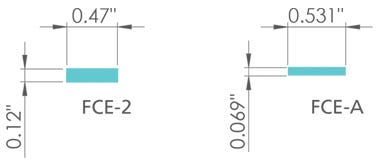
Thinner = 1/16”
Thicker = 1/8”